There are two connection modes in Pokémon Sword and Shield: Local Wireless Mode and LAN Mode. Within LAN mode, there are two connection types: wired (using Ethernet cables) and wired (using WiFi).
Local Wireless is the default mode in Pokémon Sword and Shield. This mode is recommended for most local-level tournaments. In Local Wireless Mode, Nintendo Switch systems wirelessly connect directly to each other ad-hoc, so no additional equipment is required.
LAN Mode is an alternative mode in Pokémon Sword and Shield. This mode is recommended for extremely large tournaments such as Regional Championships, International Championships, and World Championships. In LAN Mode, Nintendo Switch systems connect to each other through a networking interface, either wired or wireless. Depending on the setup, a mix of wired and wireless can be used in LAN Mode.
Connection Types
Wired (Ethernet)
LAN Mode via Ethernet requires (among other things) a LAN adapter for each Nintendo Switch system. First-party and officially licensed LAN/Ethernet adapters are recommended for use at Play! Pokémon tournaments, as most adapters are not compatible with the Nintendo Switch. The Nintendo Switch only supports some adapters using the ASIX AX88179 (max speed 1Gbps) and ASIX AX88772 (max speed 100Mbps) chipsets.
Using the wired option, you may connect Nintendo Switch systems together using a router, a networking switch, or even directly to each other. However, IP addresses must be manually assigned if using a networking switch or direct connections. When using a router, IP addresses do not need to be manually assigned. For more information on manually assigning IP addresses, and for the recommendation by TPCi on what IP addresses to use, go to the Manually Assigning IP Addresses section below.
Wireless (WiFi)
LAN Mode via WiFi requires a router to connect Nintendo Switch systems together through. As routers are able to assign IP addresses, no manual assignment is needed.
Utilizing LAN Mode
| Battle: To battle in LAN mode, go to the Battle screen and hold the L button and R button, and then press the left stick in (also known as the L3 button). The buttons must be held for about four seconds. To exit LAN Mode, press this button combination again. | 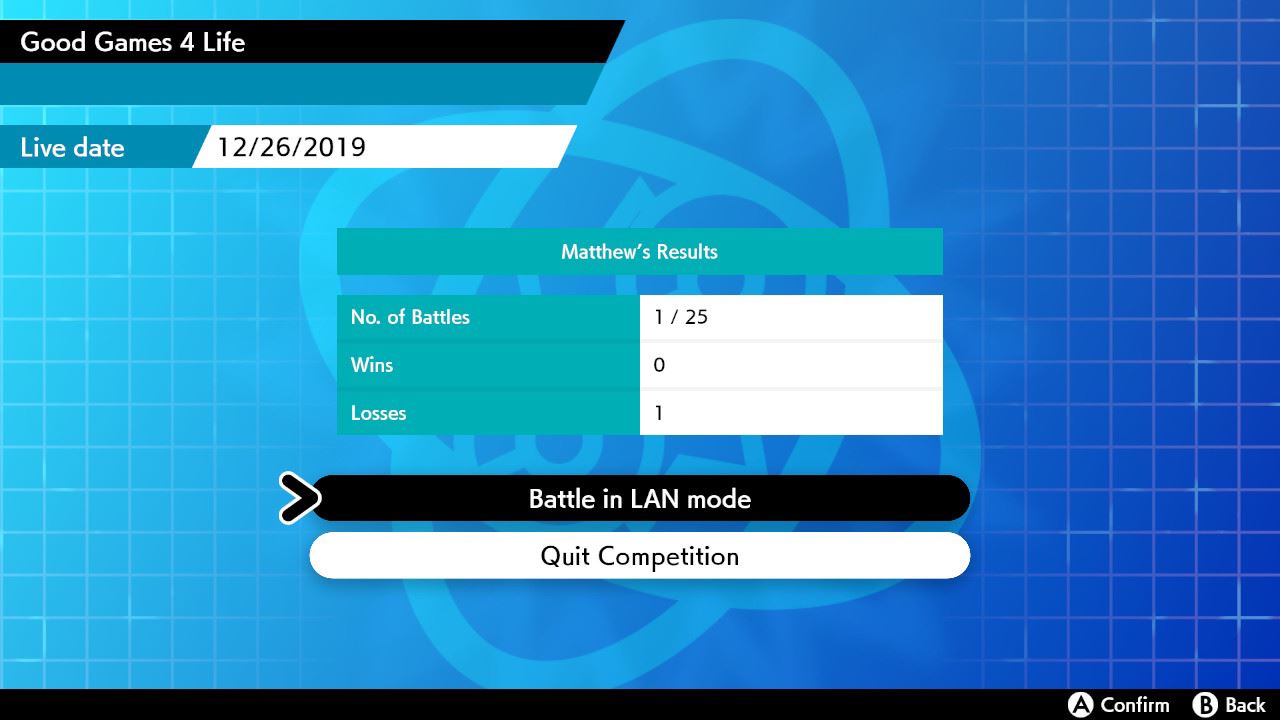 |
| Spectate: To spectate in LAN mode, go to the Host screen and hold the L button and R button, and then press the left stick in (also known as the L3 button). The buttons must be held for about four seconds. To exit LAN Mode, press this button combination again. |  |
| Send Regulations: To send battle regulations in LAN mode, go to the Send to Others screen and hold the L button and R button, and then press the left stick in (also known as the L3 button). The buttons must be held for about four seconds. To exit LAN Mode, press this button combination again. | 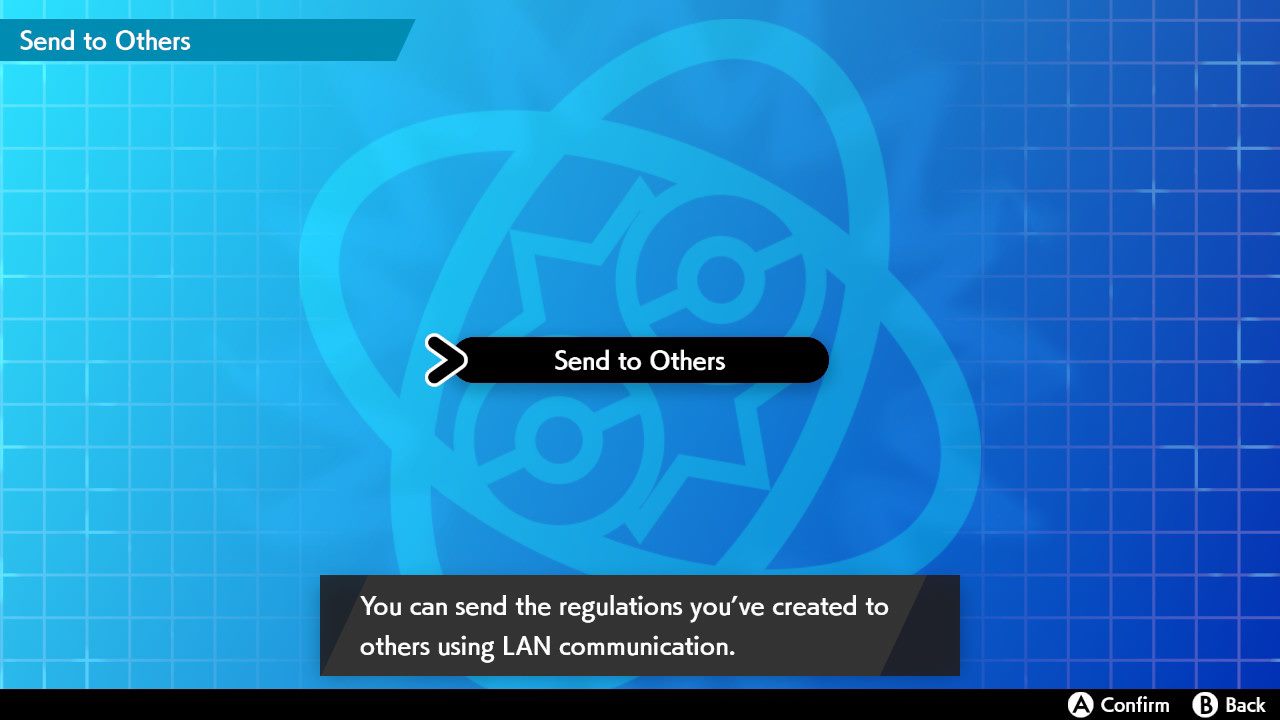 |
| Receive Digital Player ID: To receive a Digital Player ID in LAN mode, go to the Participate screen and hold the L button and R button, and then press the left stick in (also known as the L3 button). The buttons must be held for about four seconds. To exit LAN Mode, press this button combination again. | |
Manually Assigning IP Addresses
This section is based on a draft document compiled by The Pokémon Company International.
When connecting Nintendo Switch systems through a networking switch or directly to each other in LAN Mode, IP addresses need to be manually assigned.
| Step 1: From the HOME Menu, open System Settings. |  | ||||||||||||
| Step 2: Scroll down to the Internet section and select Internet Settings. | 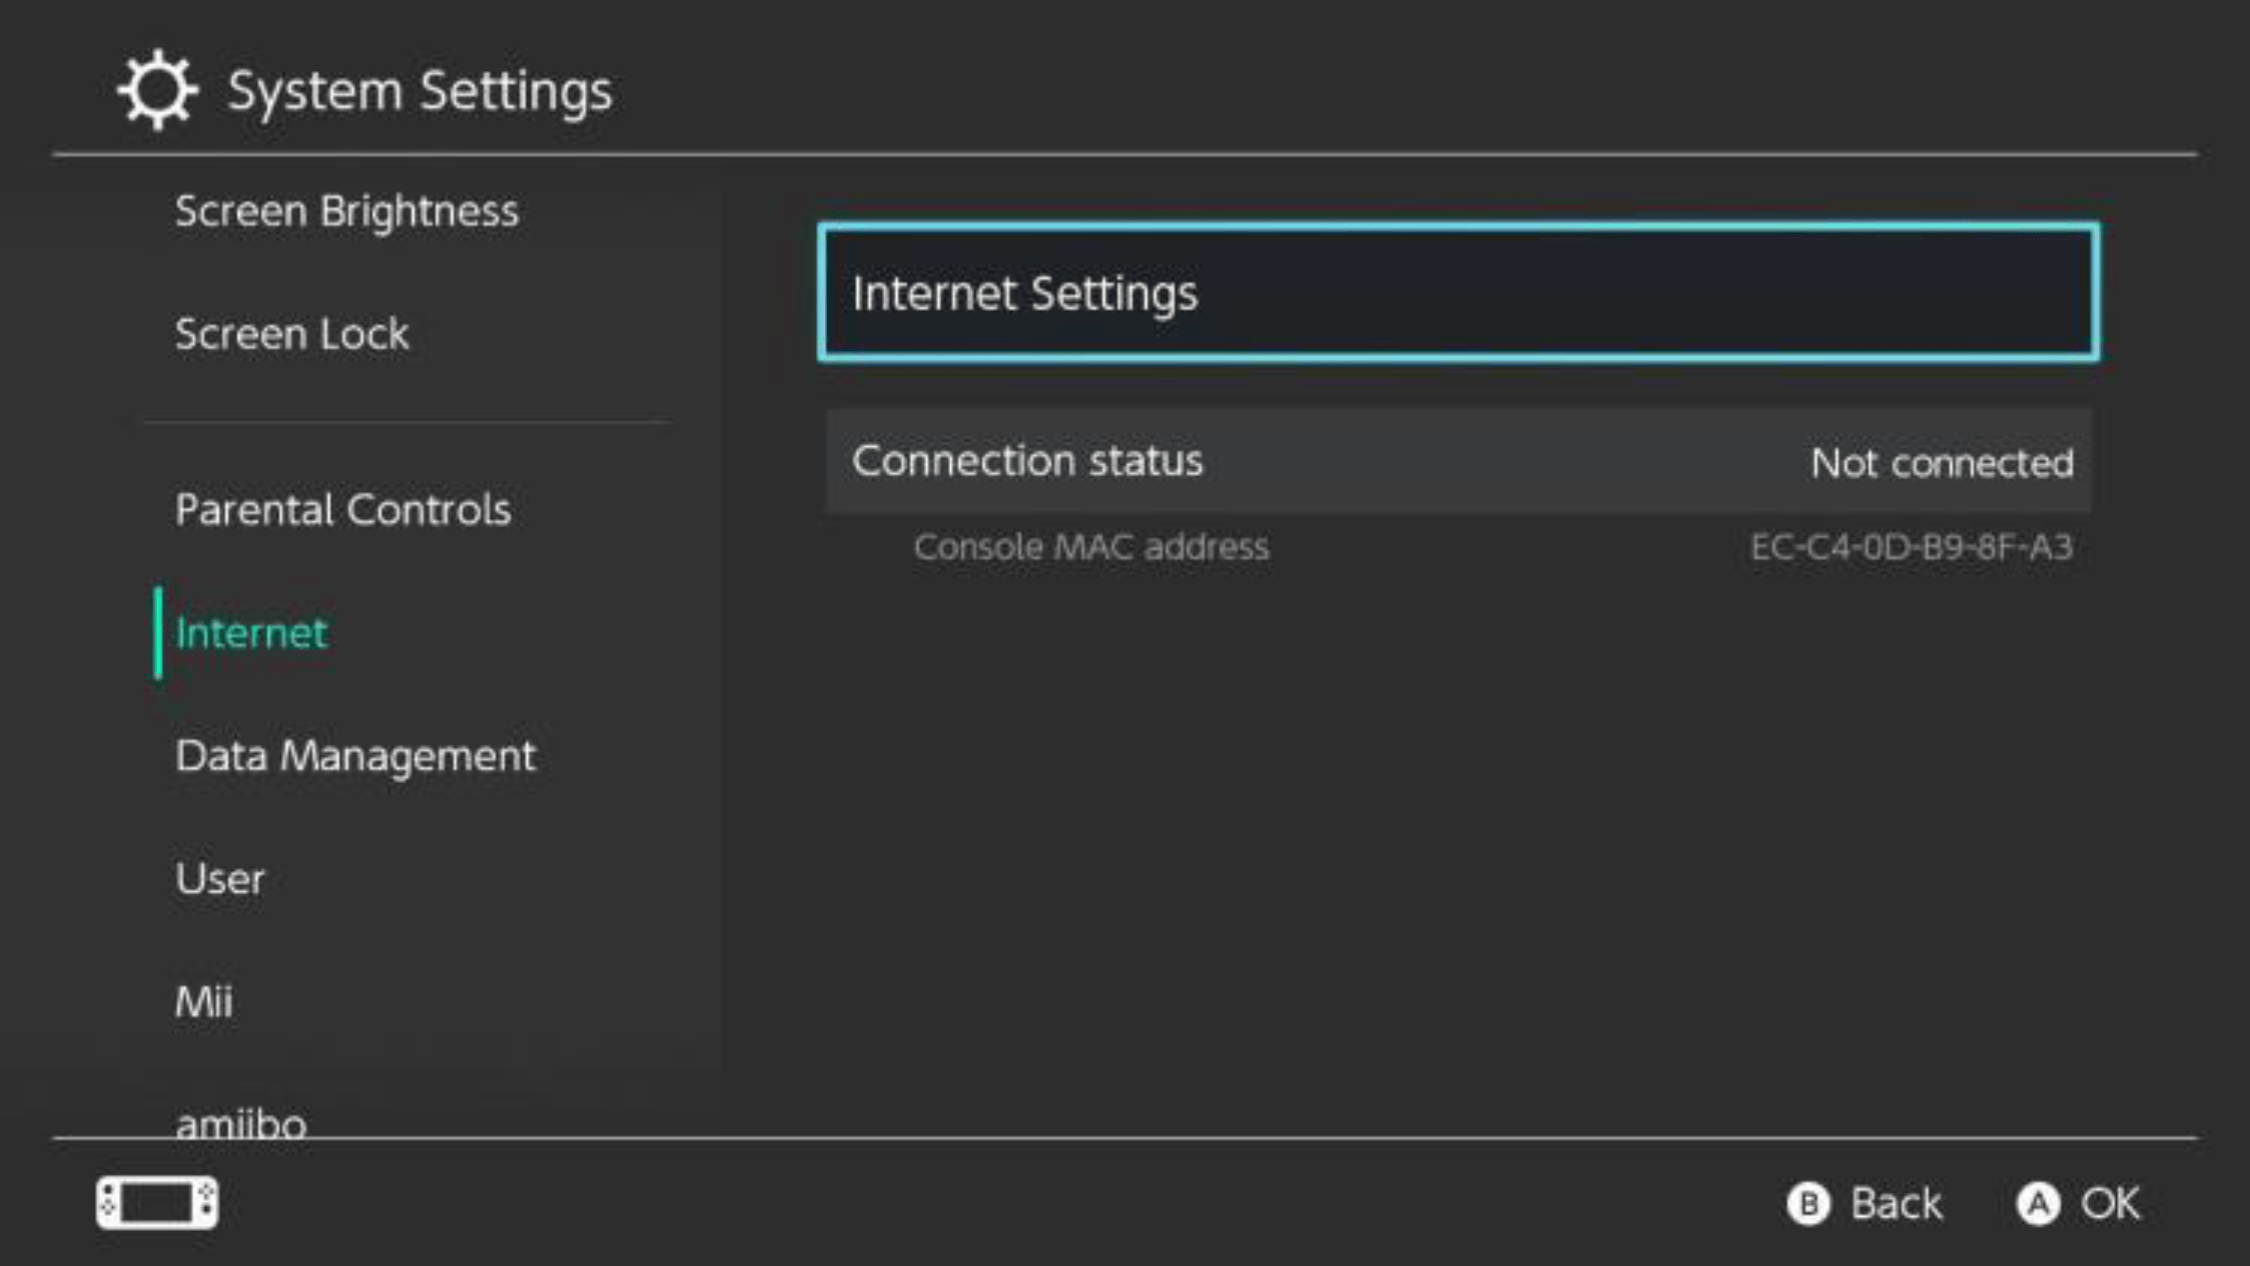 | ||||||||||||
| Step 3: At the bottom of the Registered Networks section, select Wired Connection. | 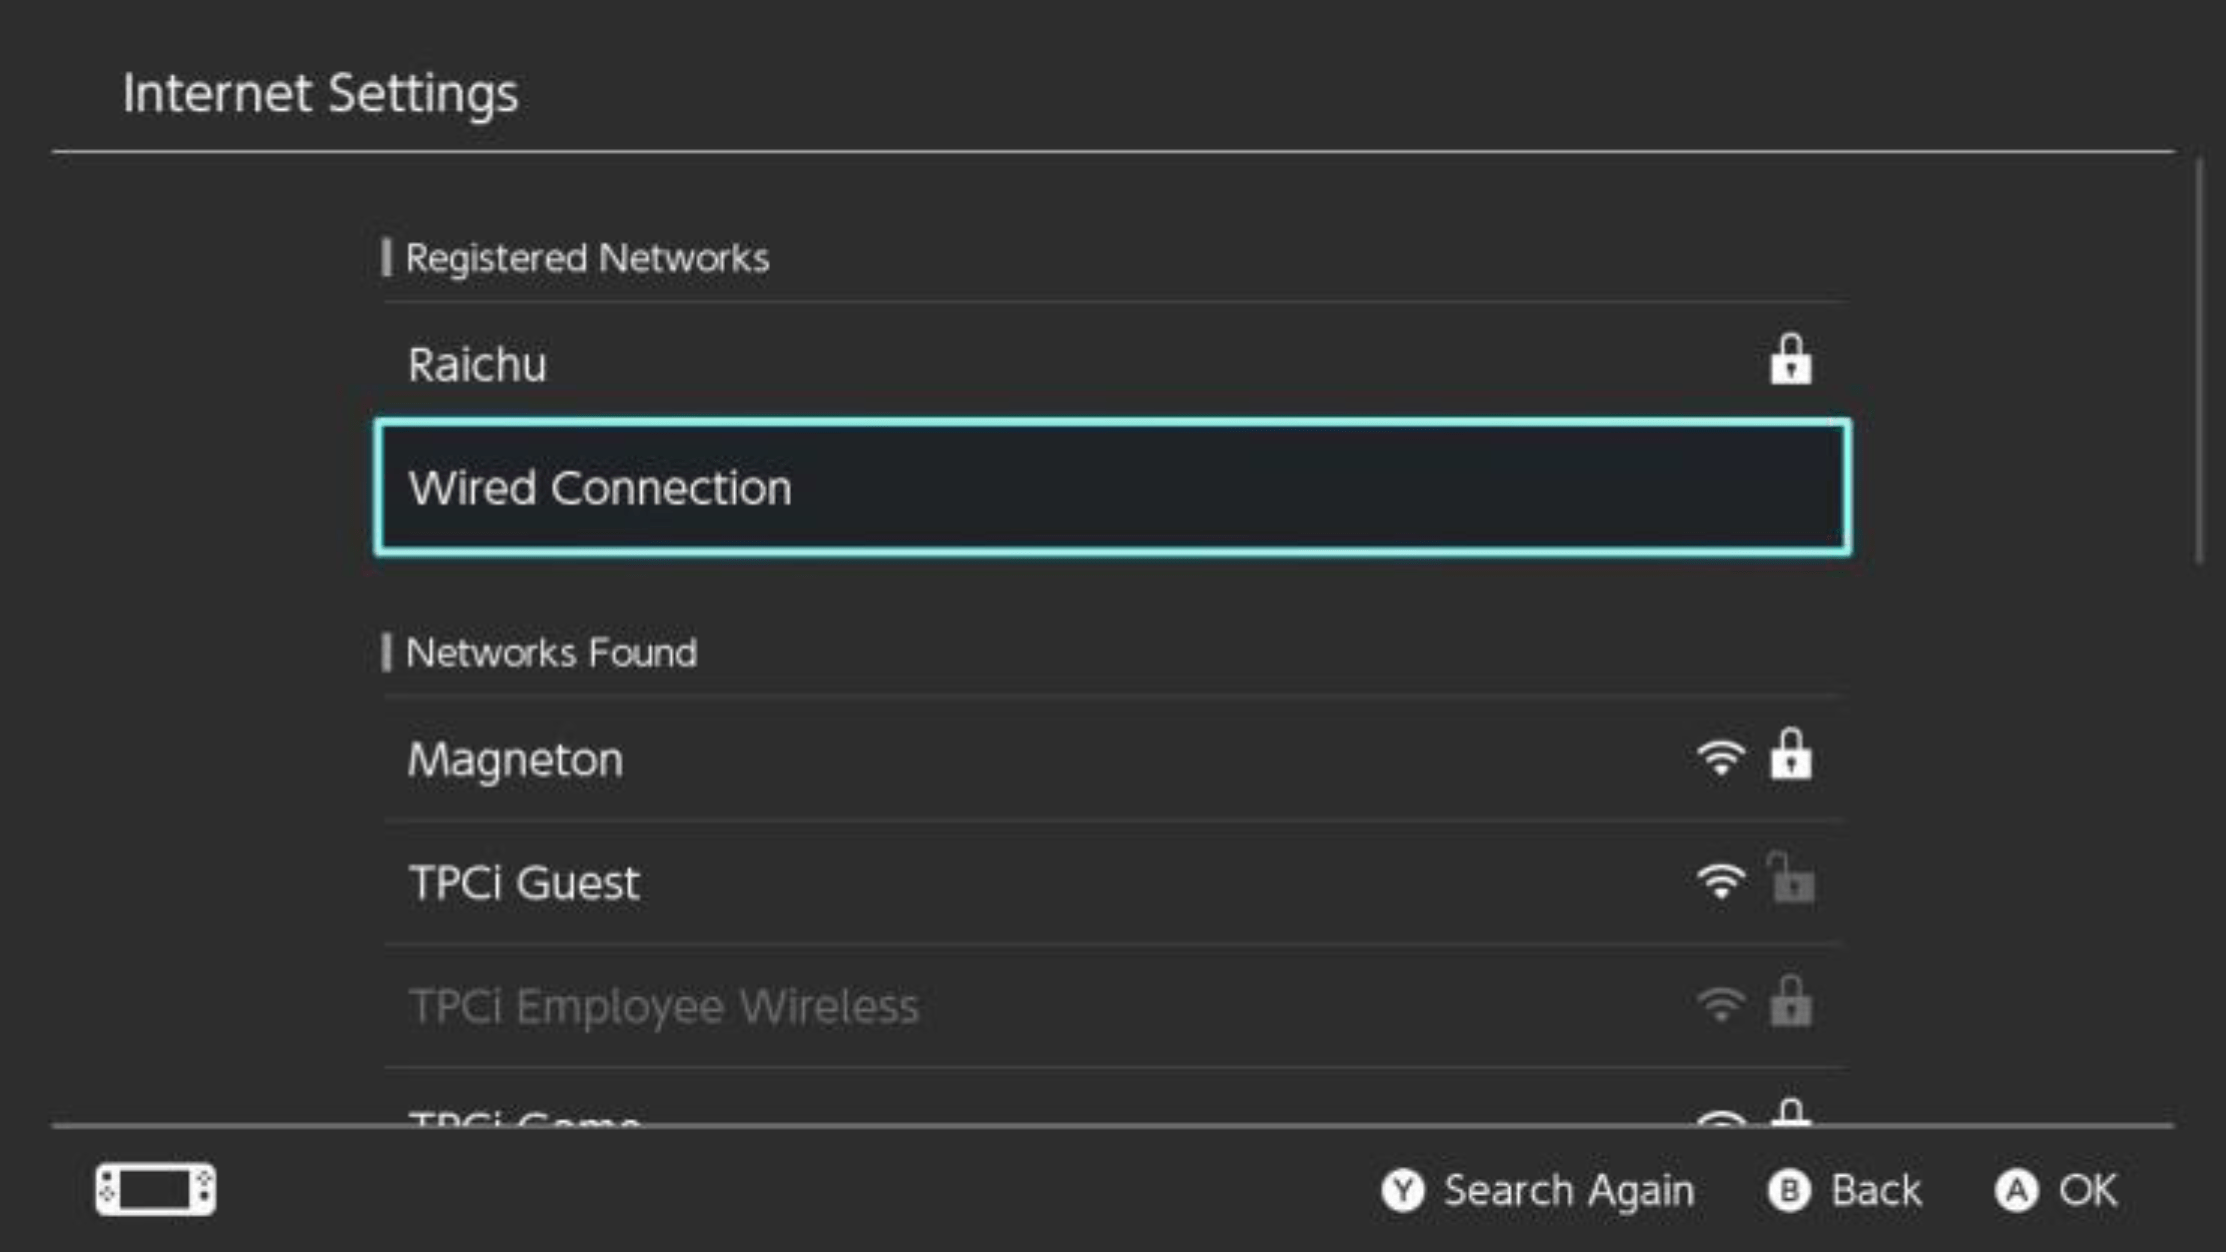 | ||||||||||||
| Step 4: Select Change Settings. | 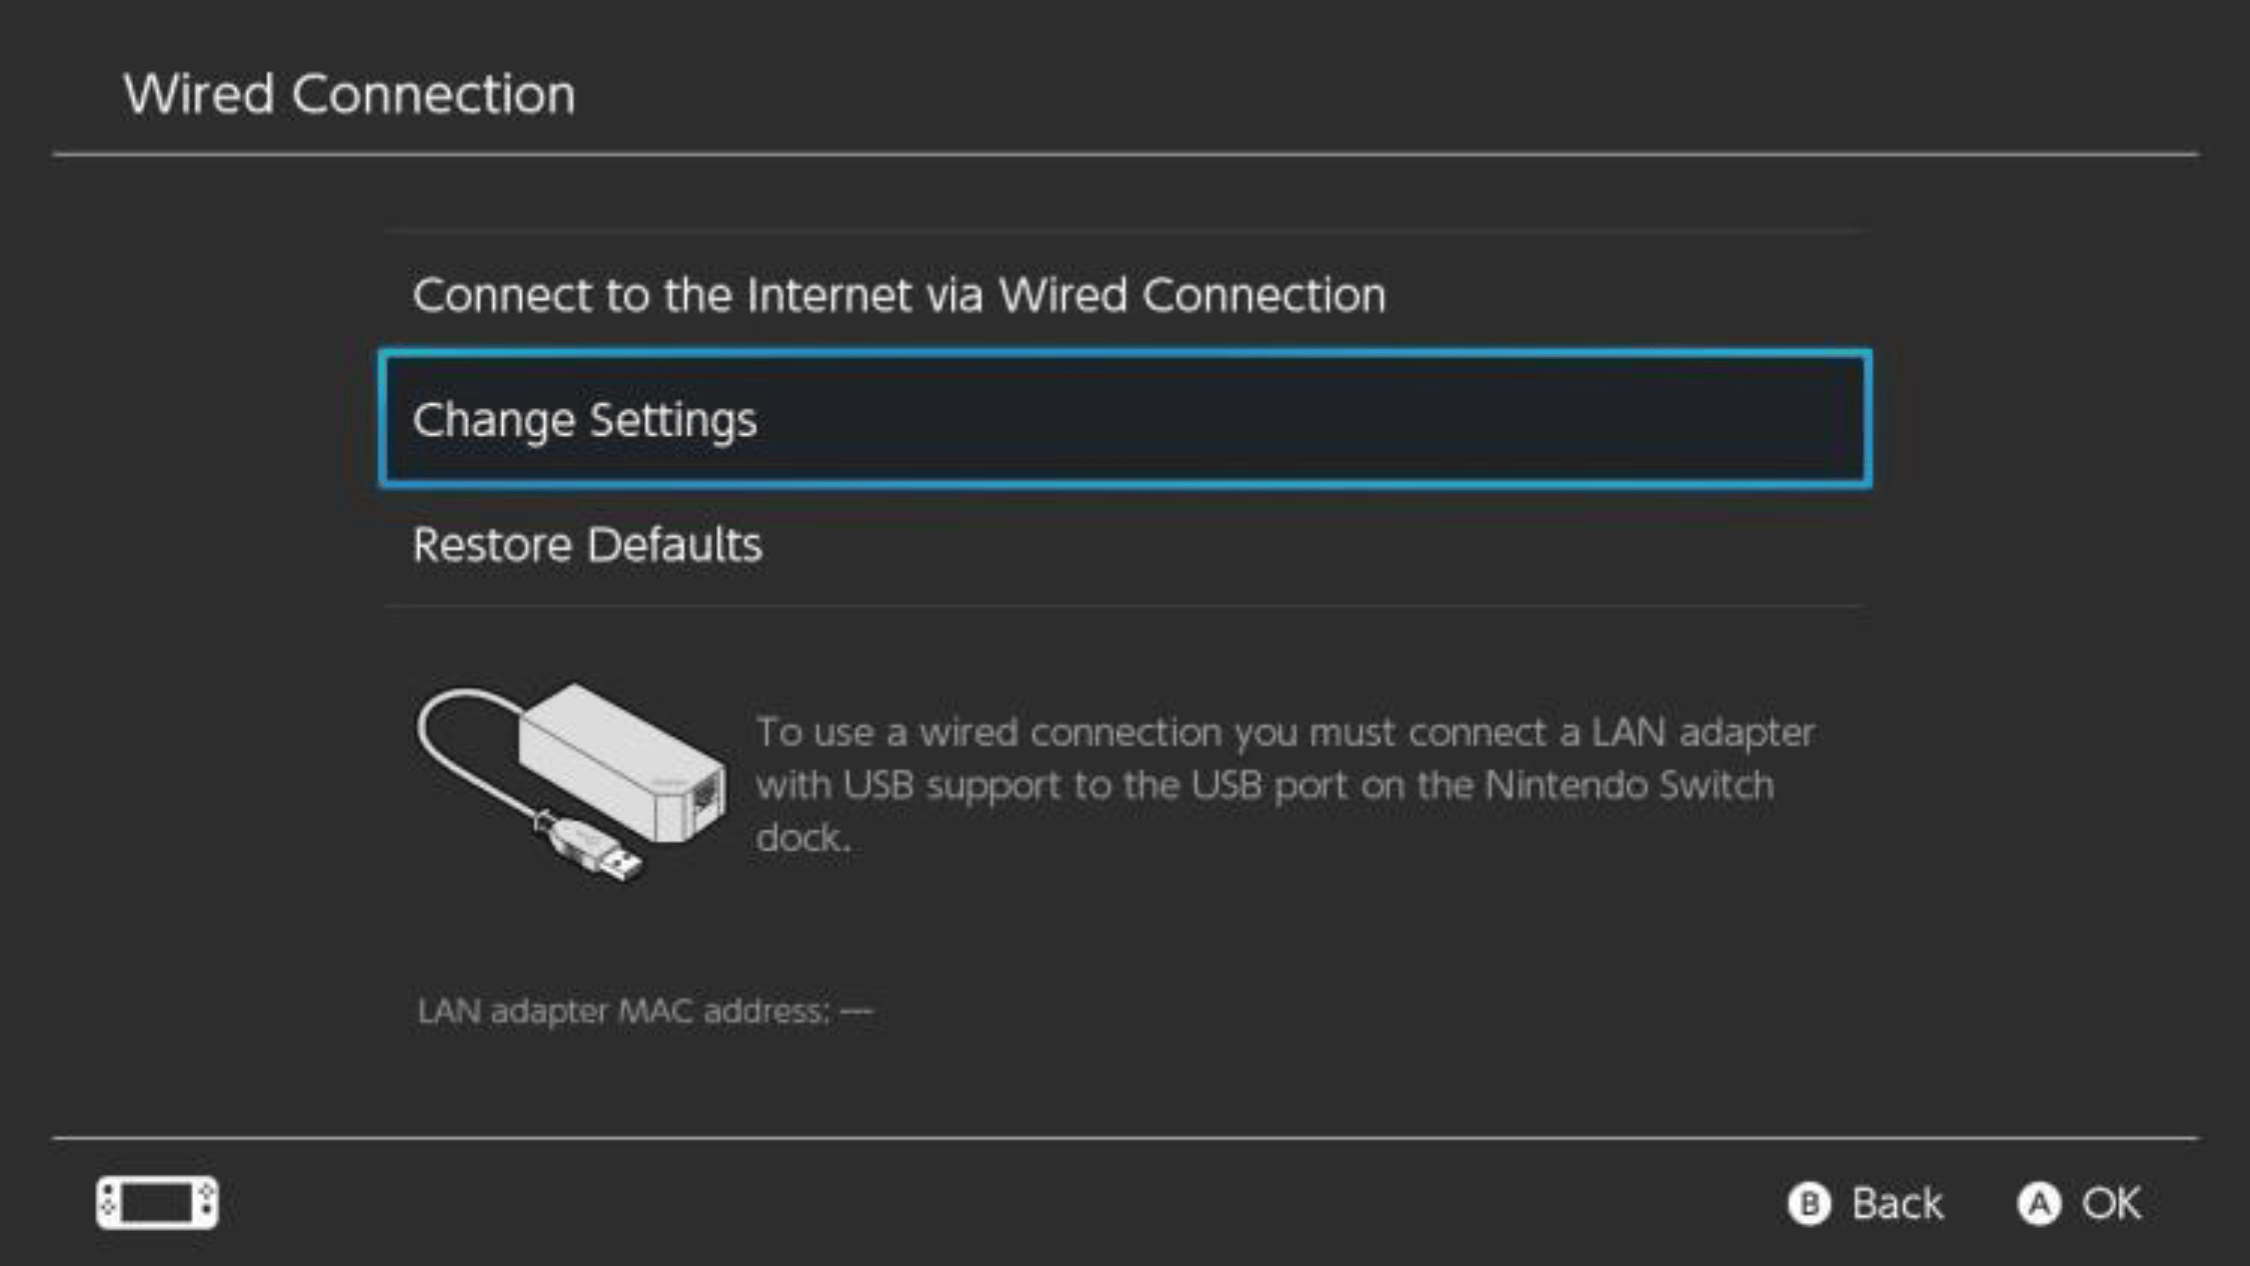 | ||||||||||||
| Step 5: Set both the IP Address Settings and DNS Settings to Manual. | 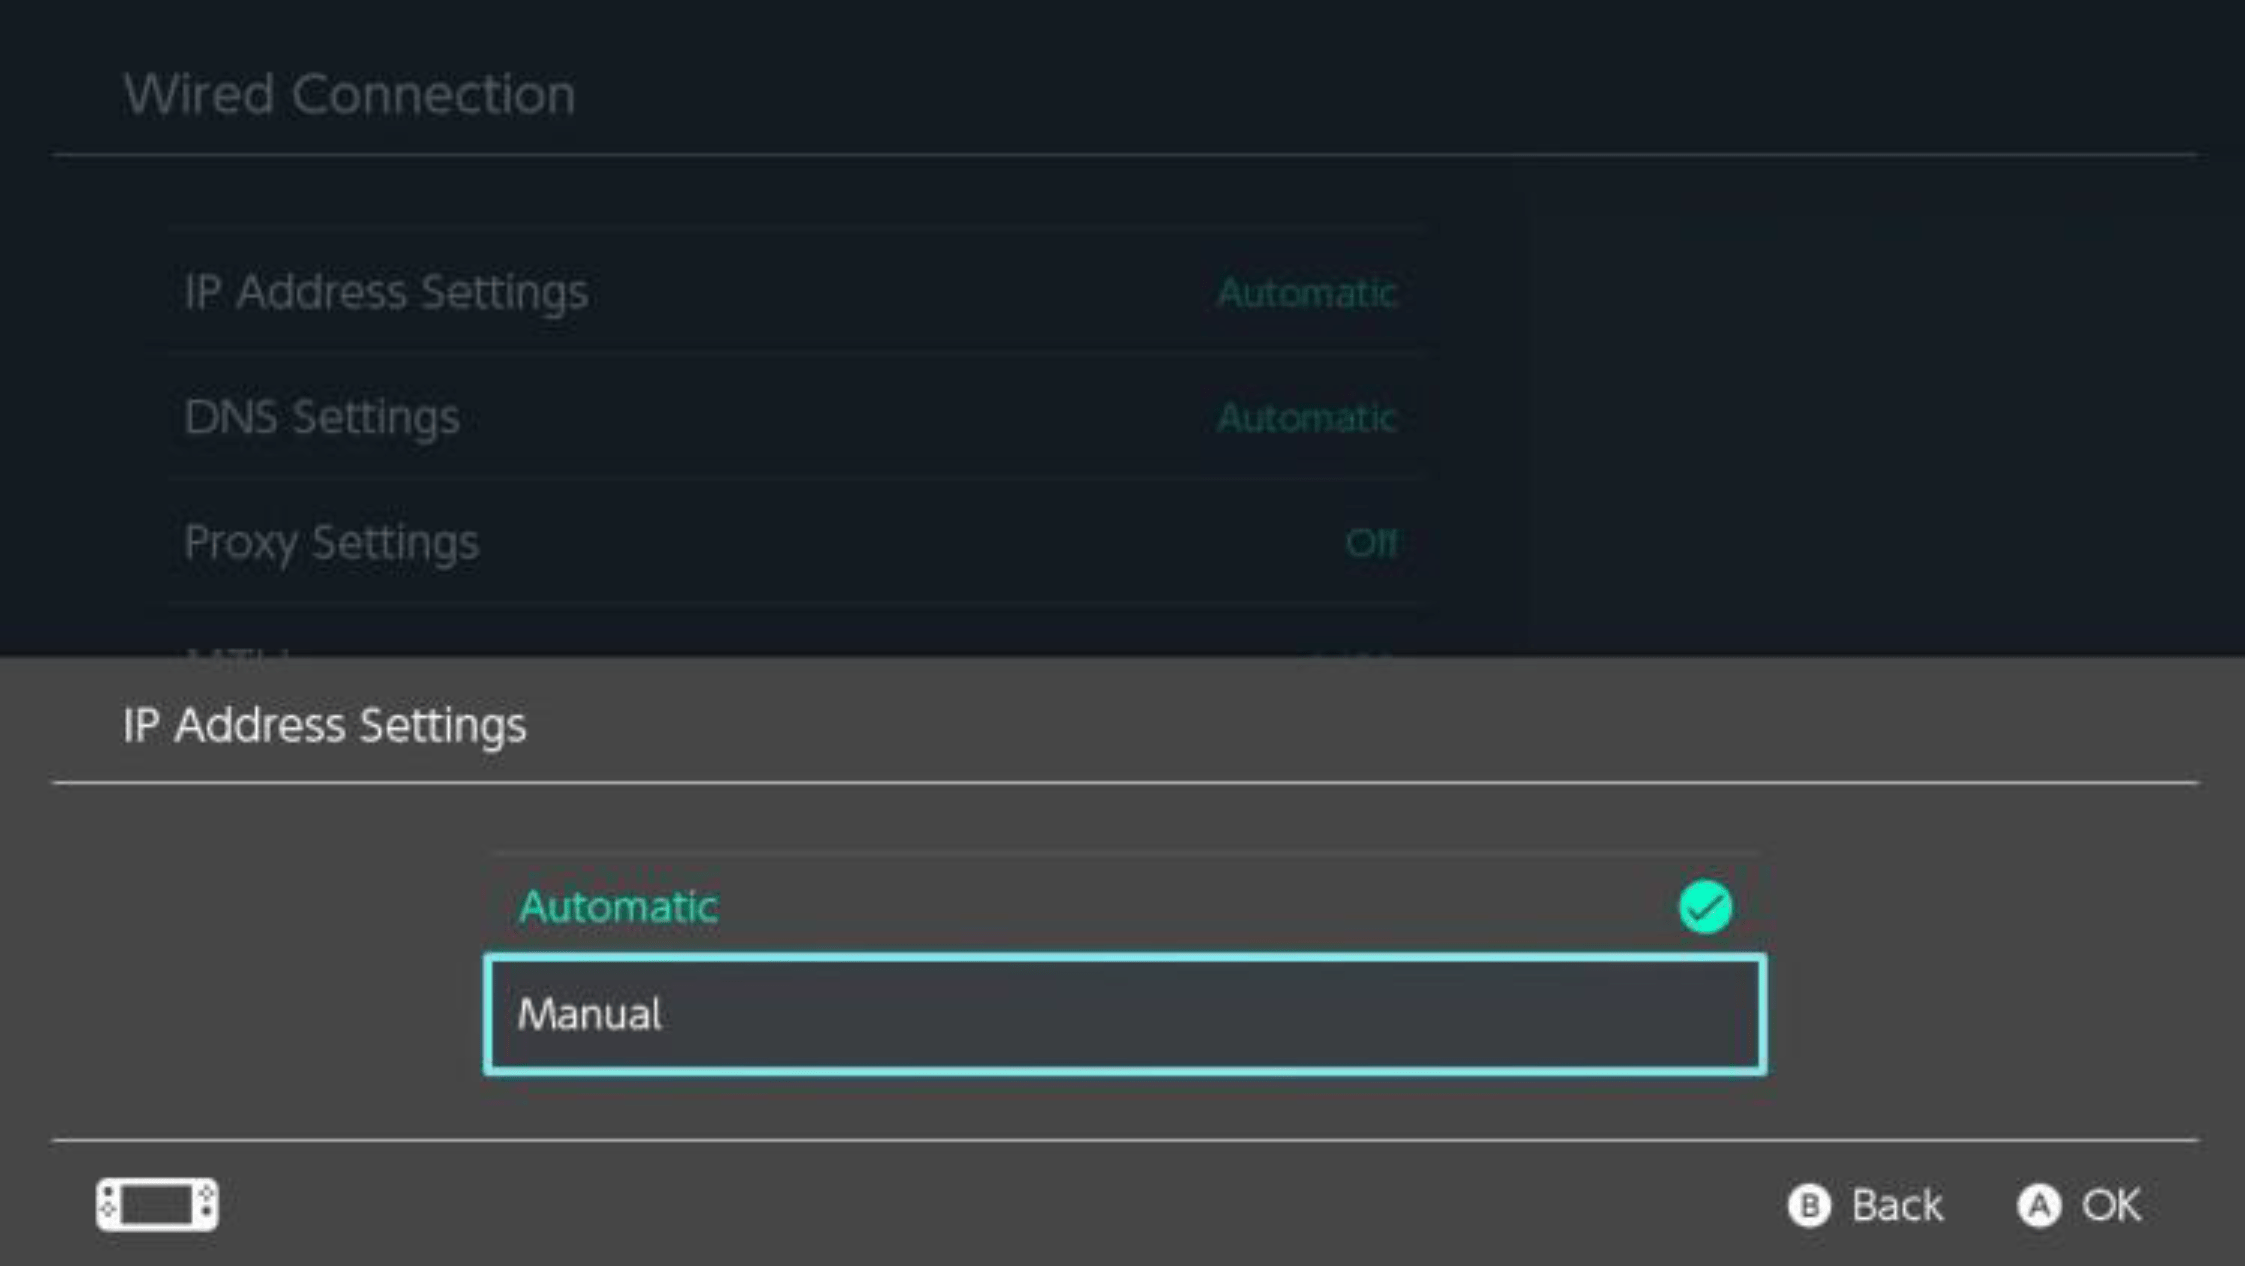 | ||||||||||||
Step 6: Select IP Address to set the IP address for the system. TPCi recommends constructing the IP address based on your Player ID. Follow the table below as a guide on how to create it based on the number of digits in your Player ID:
| 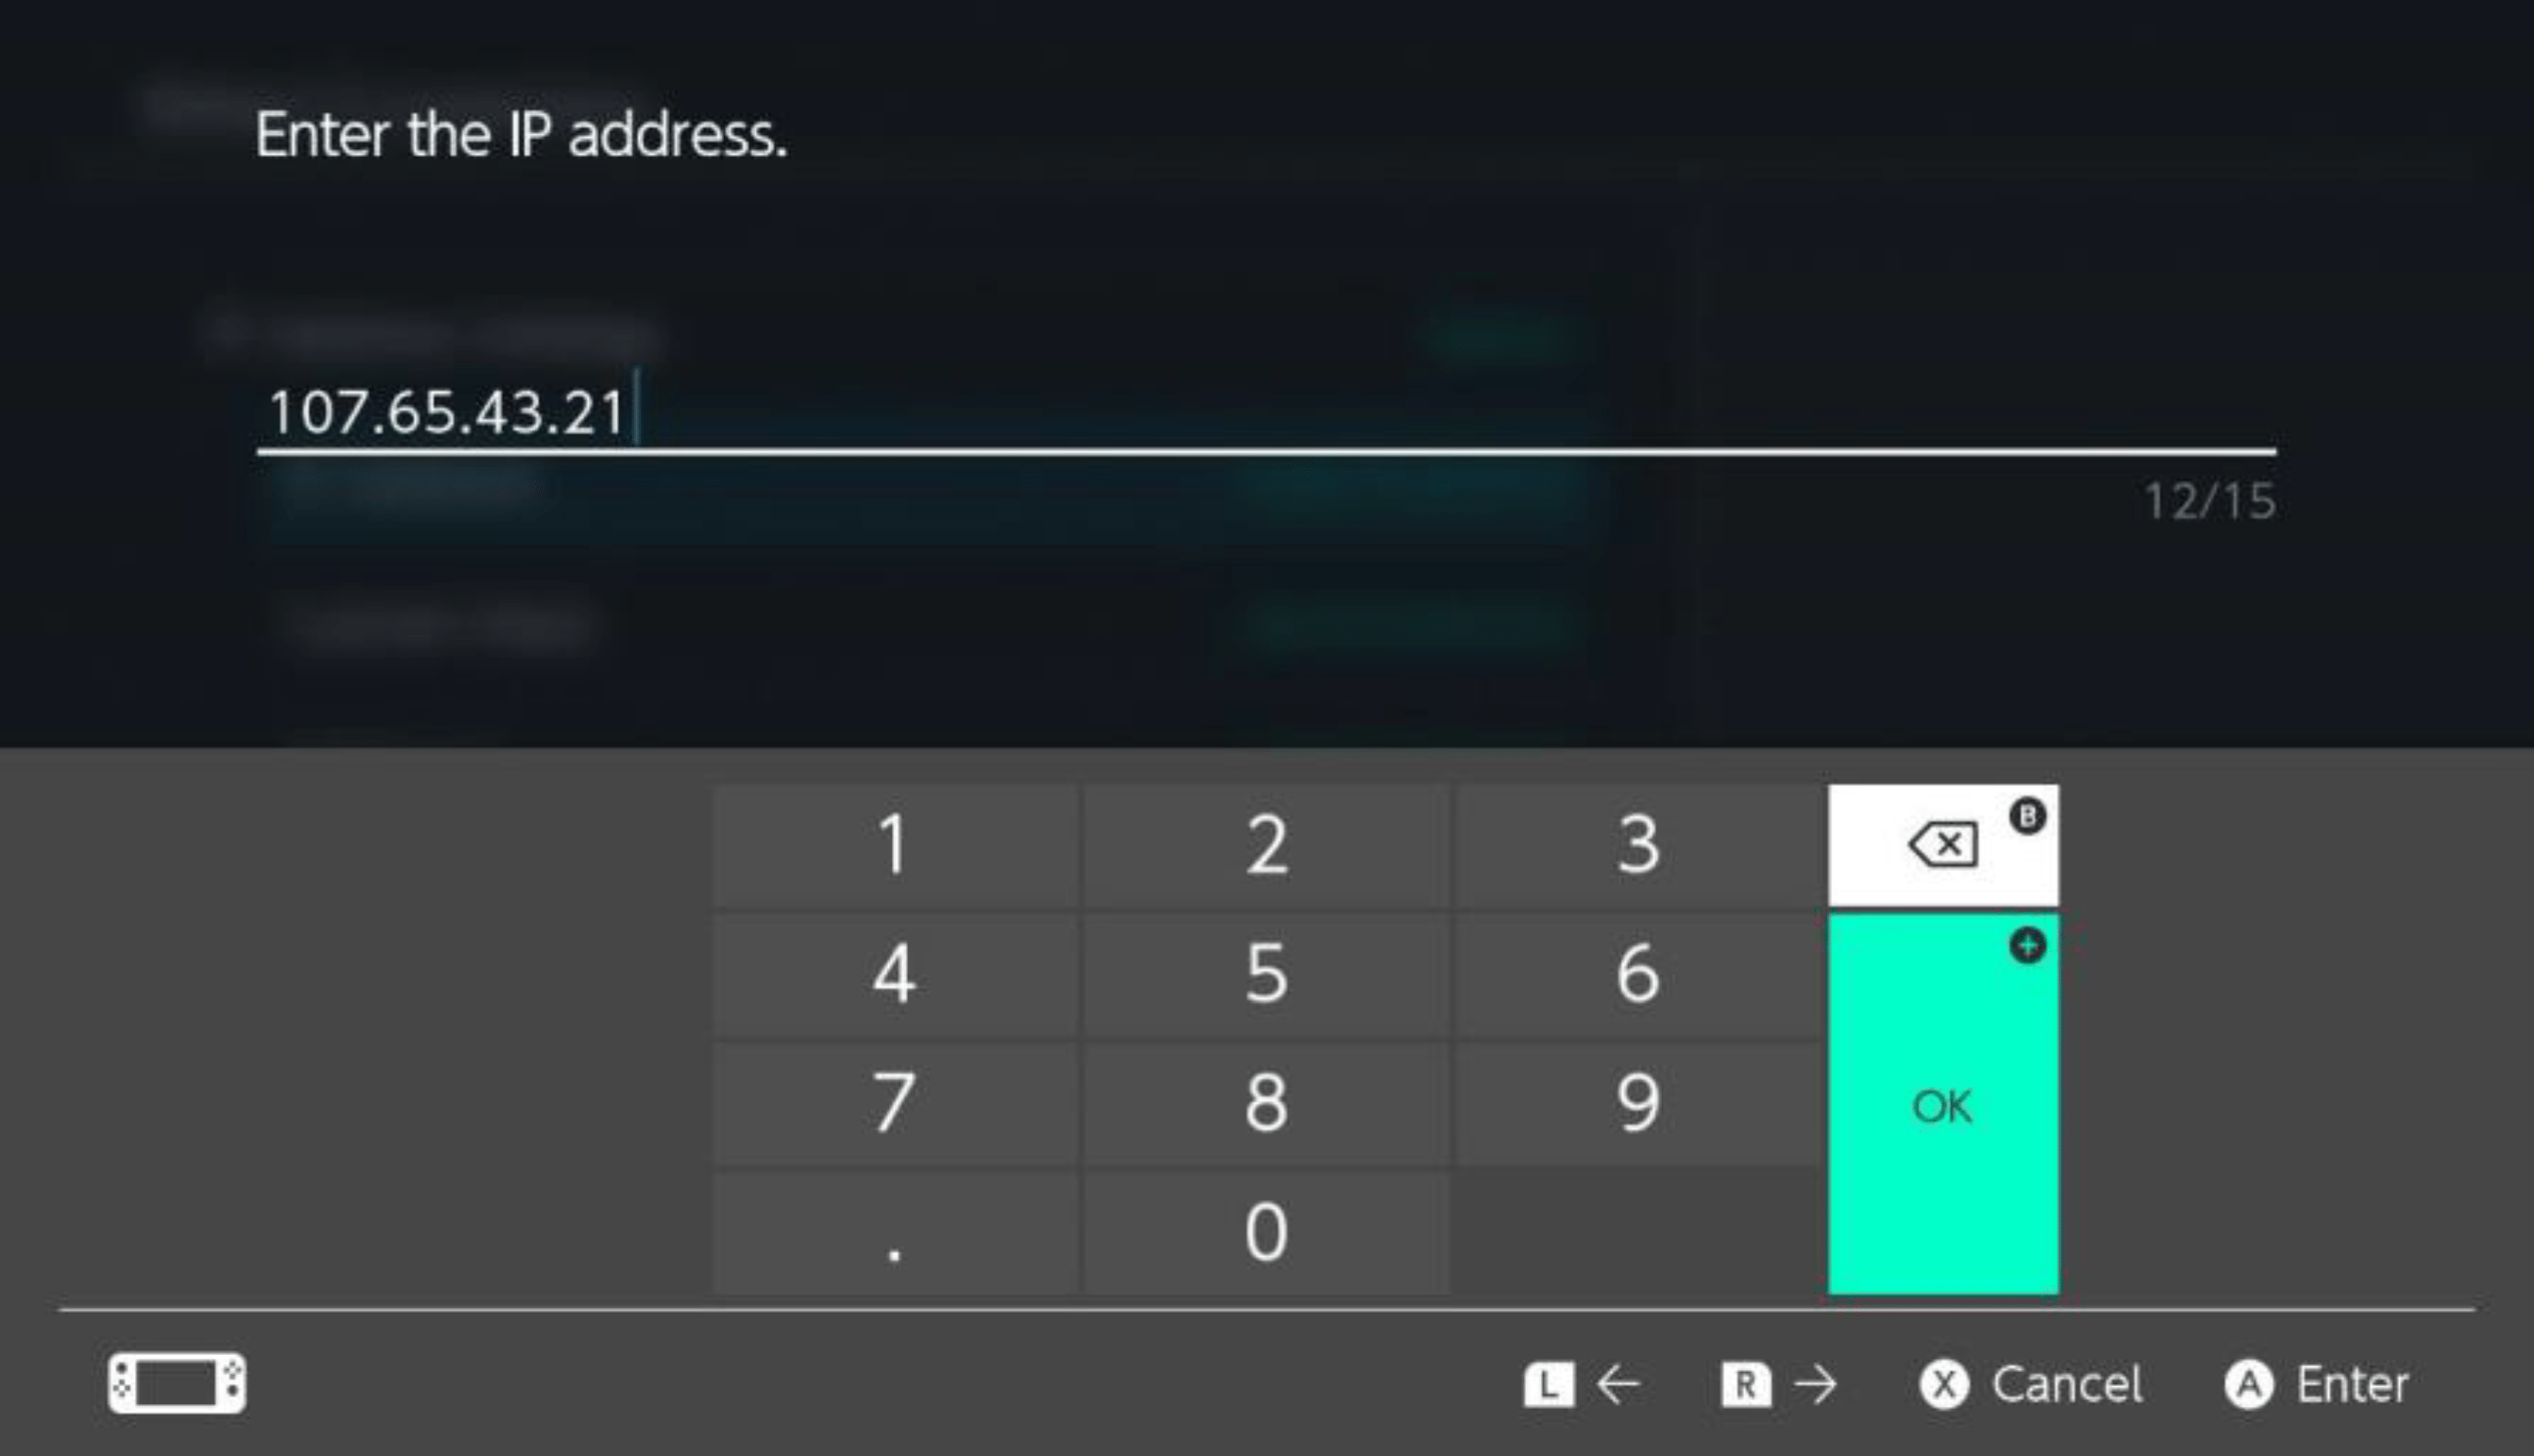 | ||||||||||||
| Step 7: Set the Subnet Mask to 240 (it will automatically add zeroes when you press OK). | 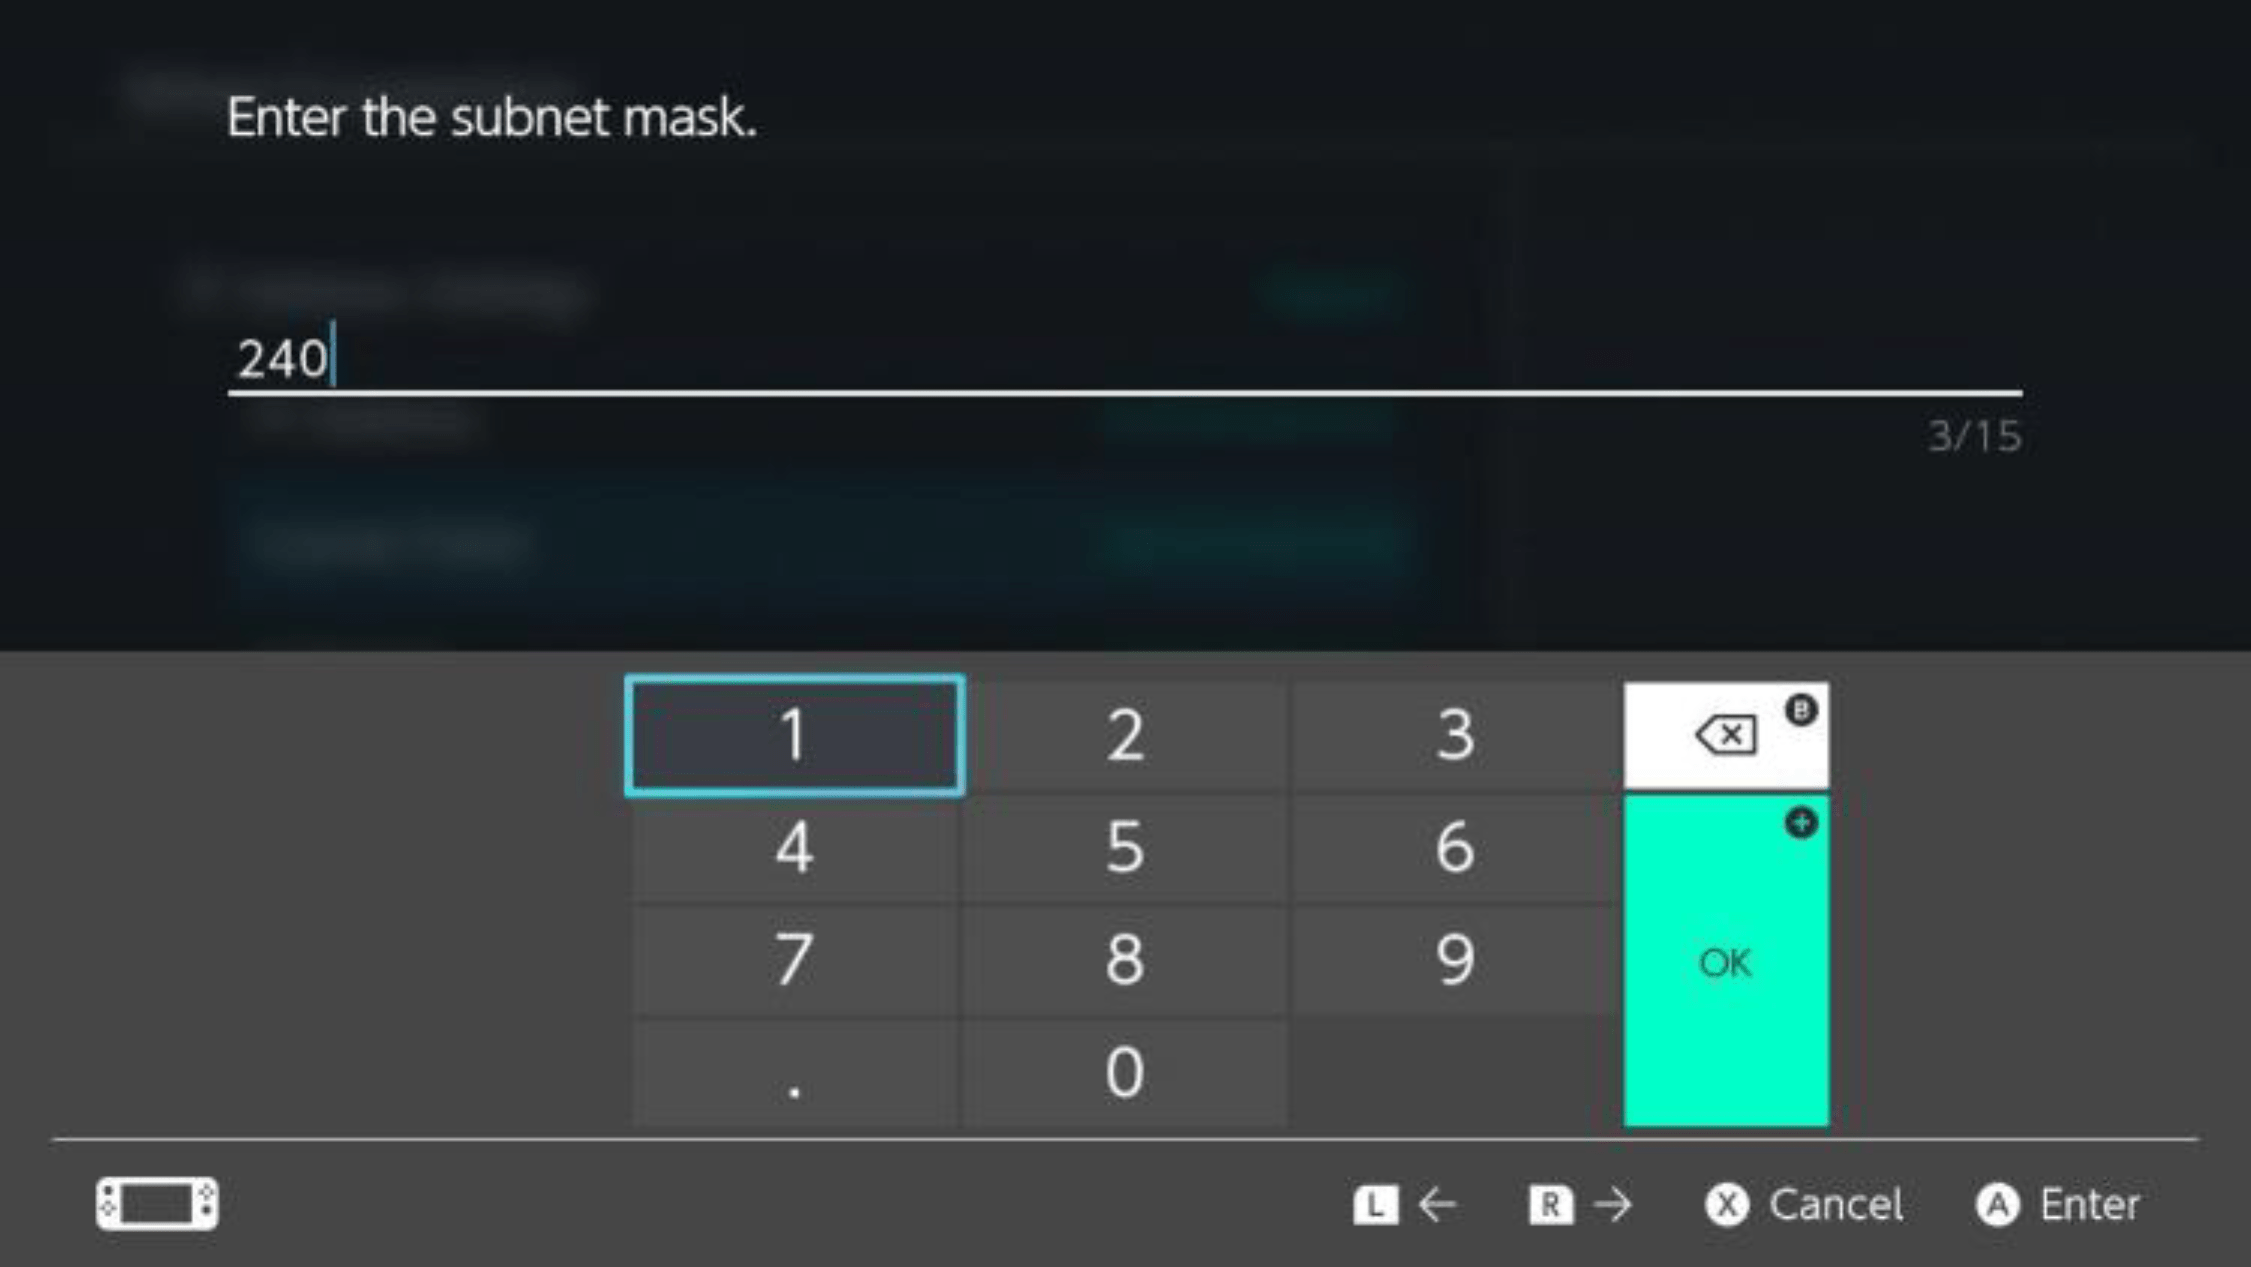 | ||||||||||||
| Step 8: Set the Gateway to 100 (it will automatically add zeroes when you press OK). |  | ||||||||||||
| Step 9: Set the Primary DNS to 100 (it will automatically add zeroes when you press OK). Do not change the Secondary DNS. | 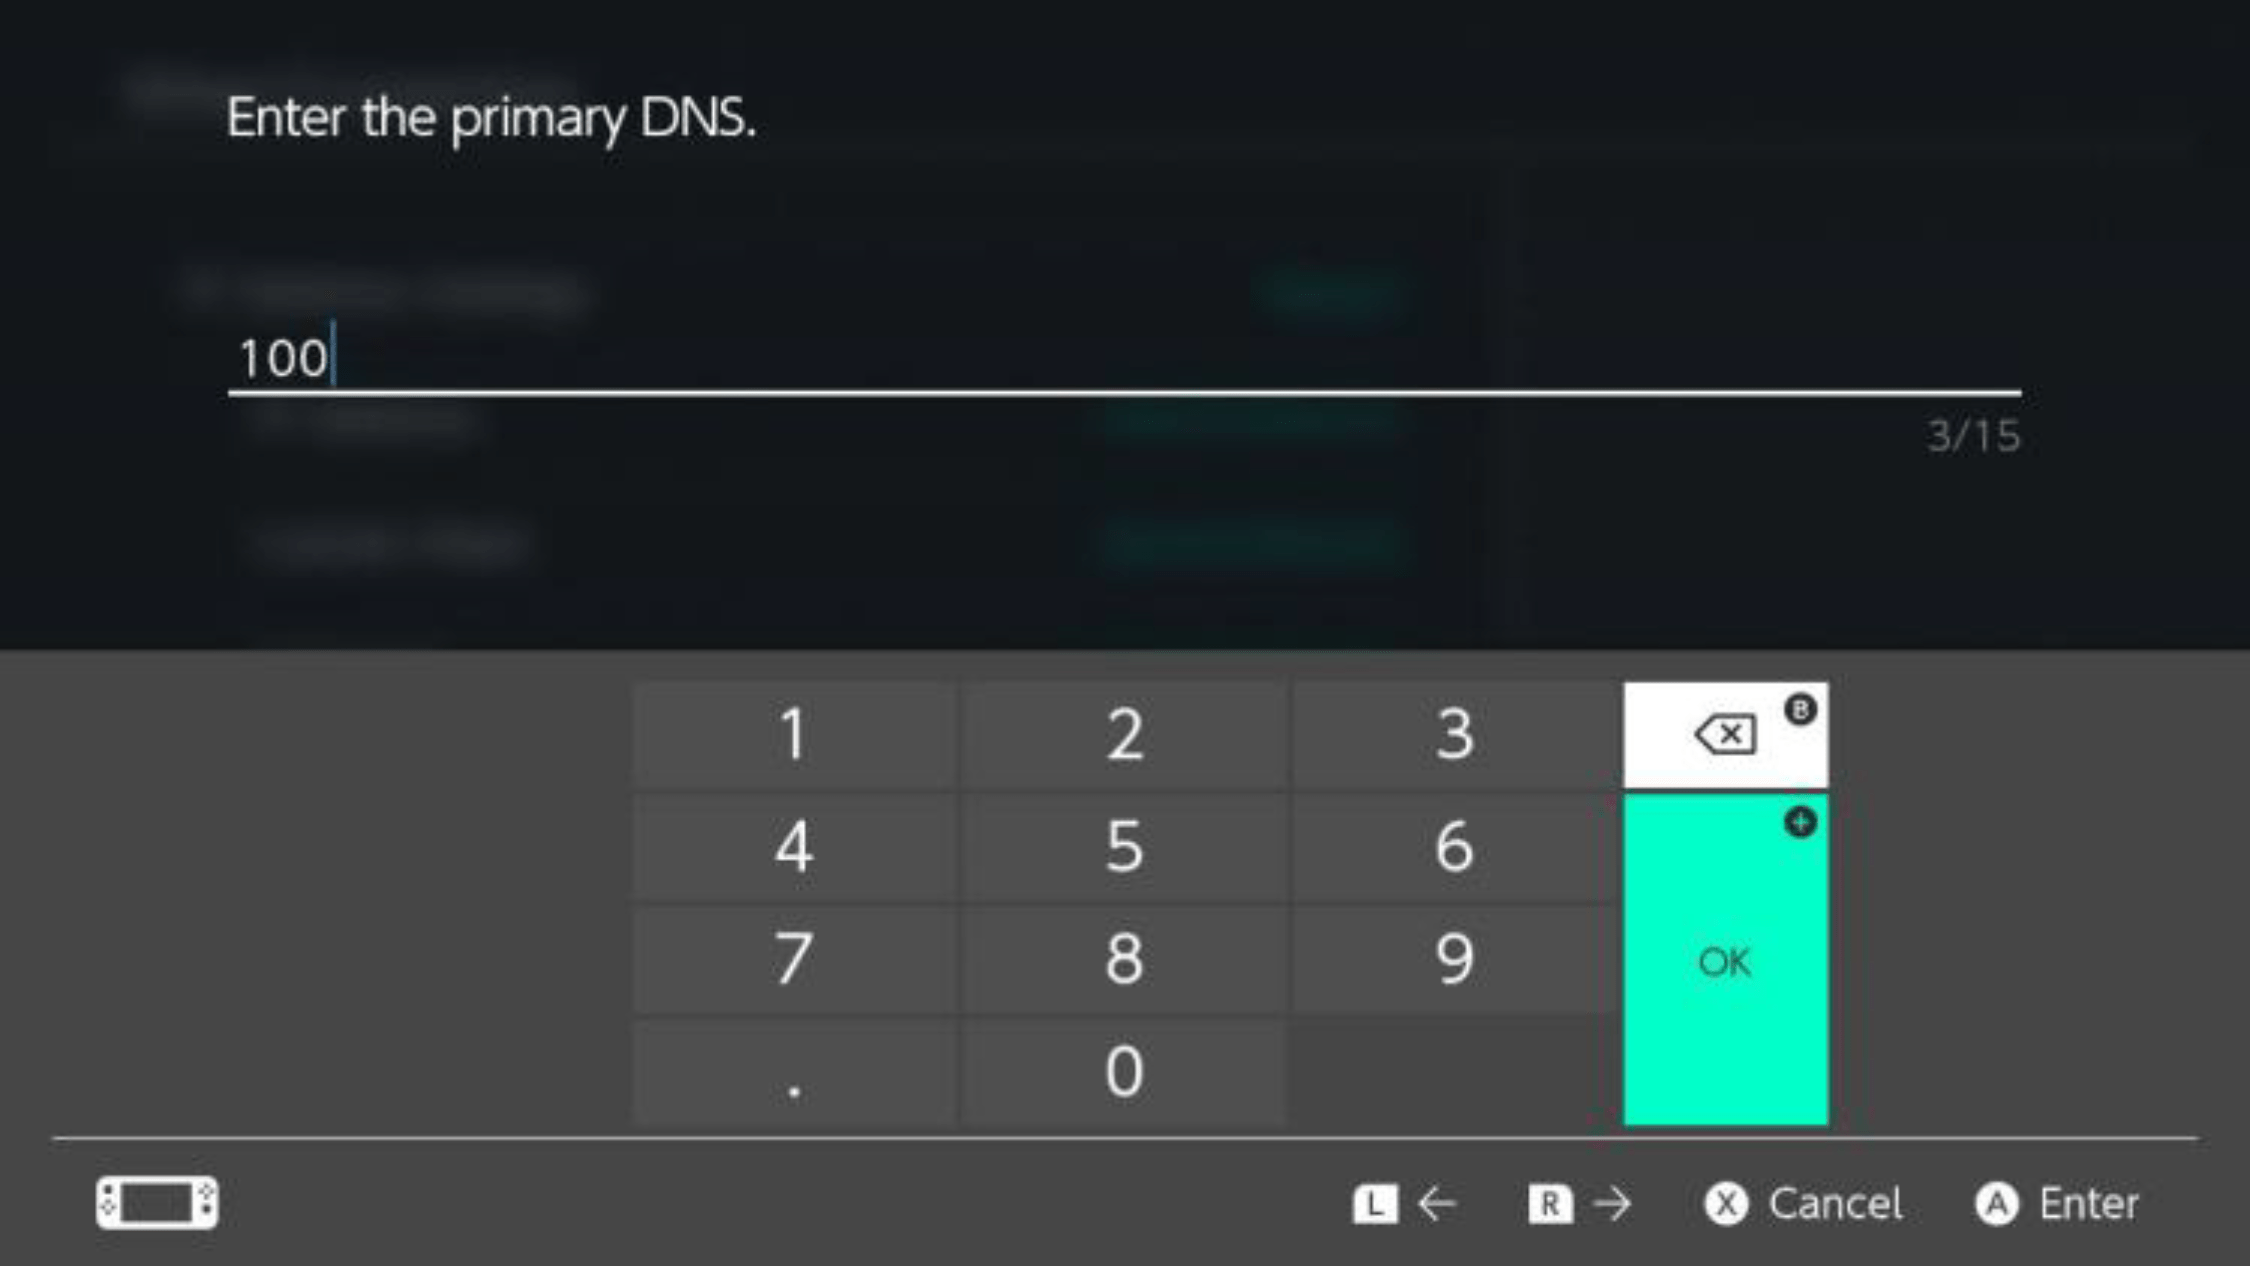 | ||||||||||||
| Step 10: Your settings should now look similar to this. Click Save. You’re now ready for the tournament! | 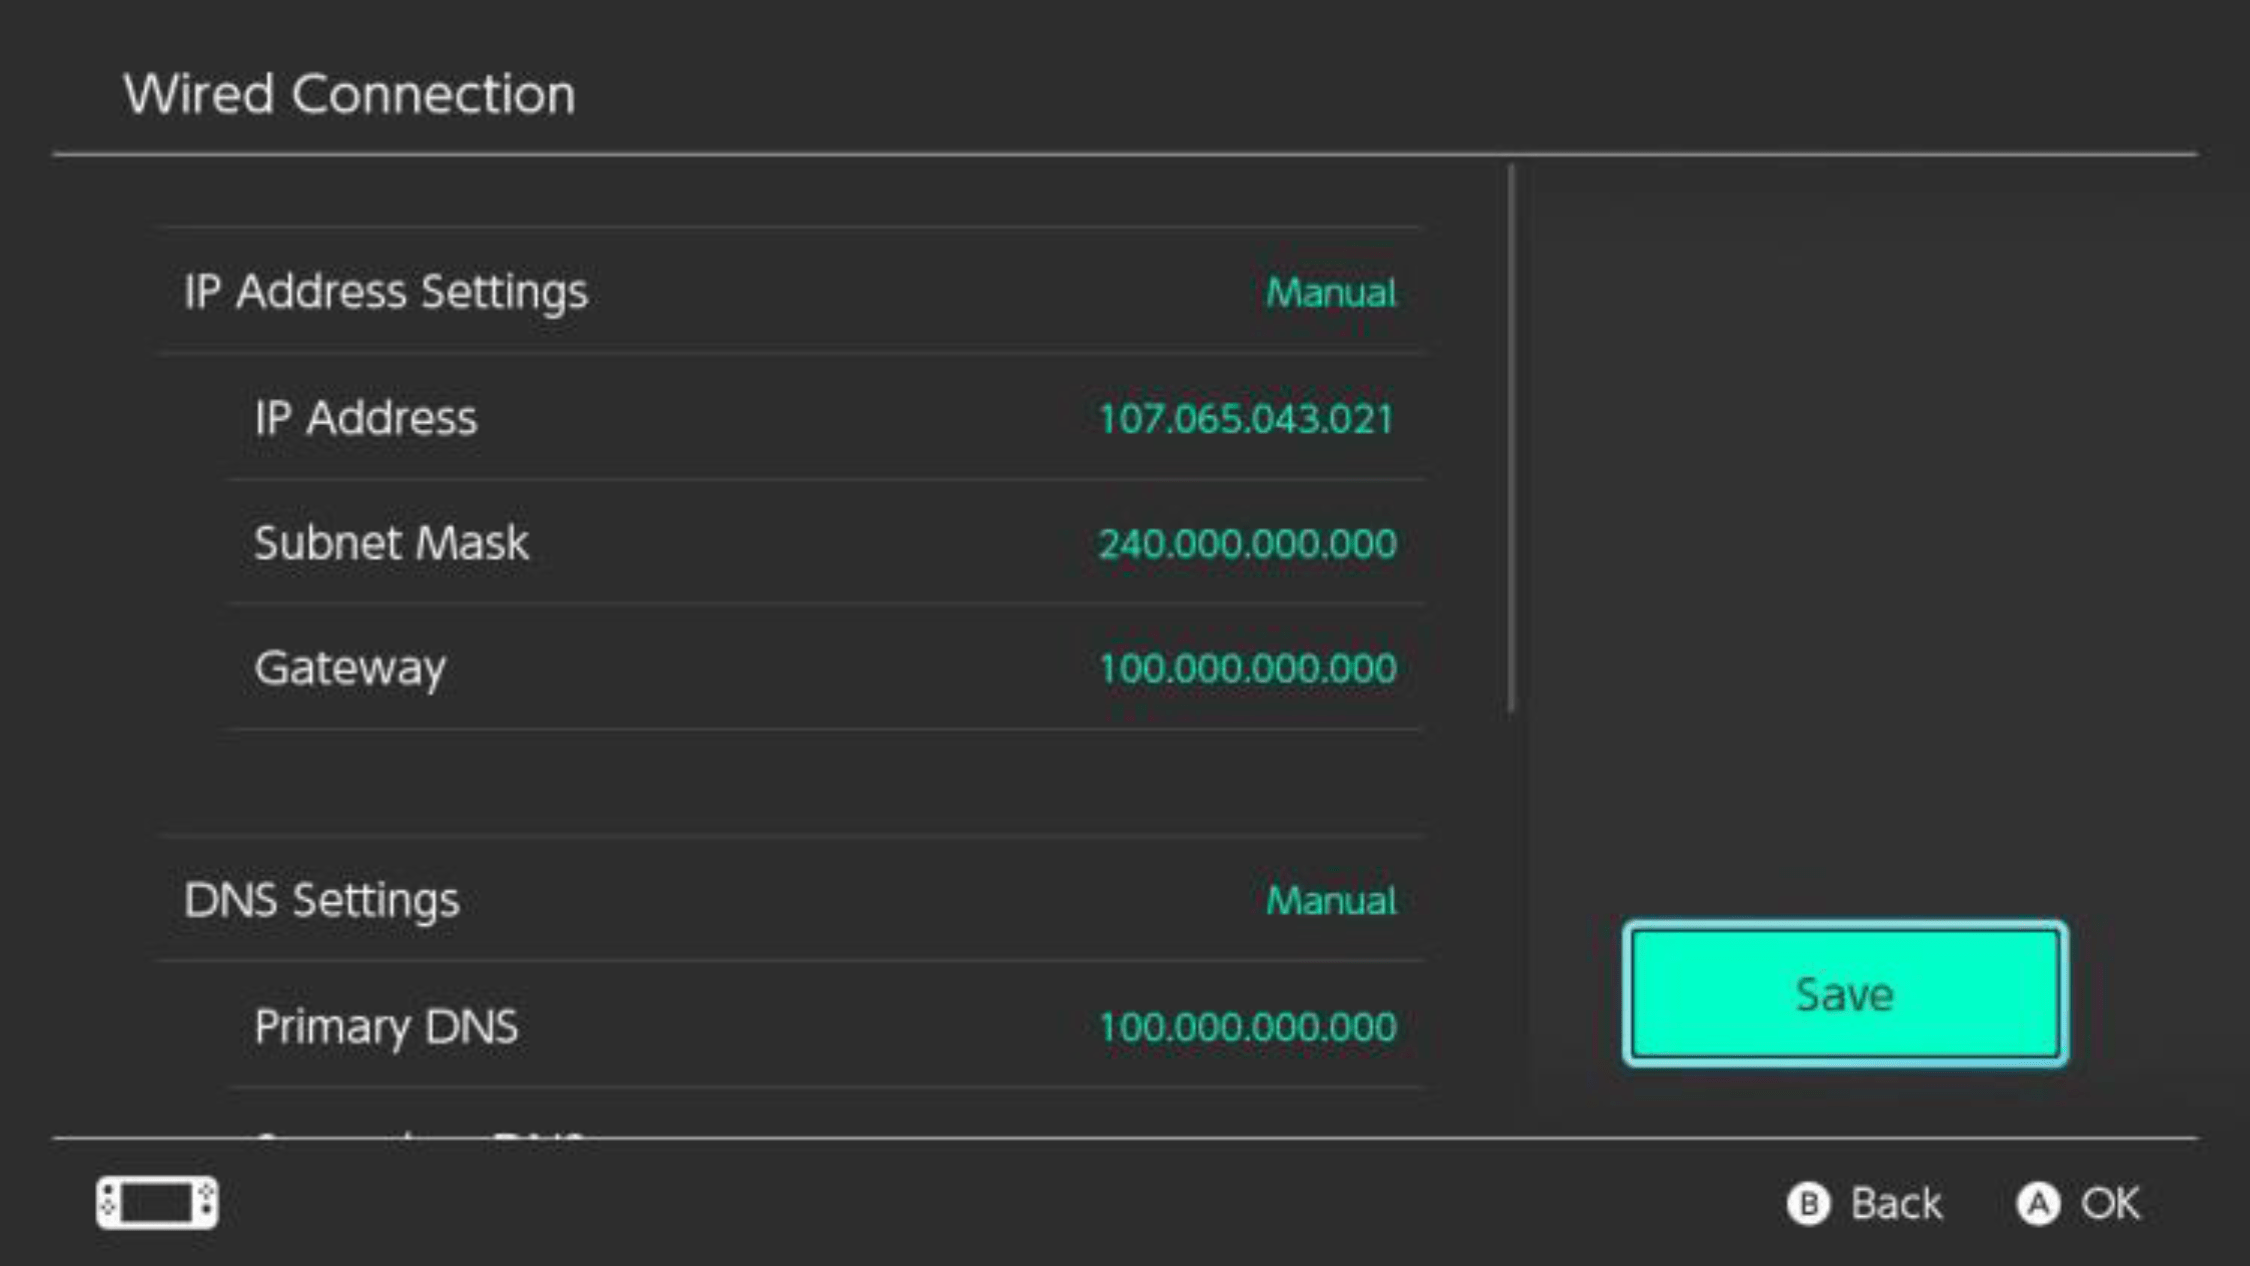 |